top tips
Yak: Emma
Bonus tip! lino cuts better when its warm, you could have a little hot water bottle on the side you're not cutting or have a brew to hand....I use the brew technique.
Babble: Jess
Thanks for reading! If you have any hints or tips feel free to share them in the comments below!
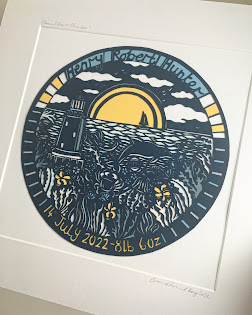
Lino cutting for me is incredibly therapeutic. The repetitive motion of gliding the blade across the surface of the lino to reveal an image is for me the best part of the process.
'Oh I remember doing that at school'
'did you enjoy it?'
'no I cut my finger and never did it again'
This is sadly, an all too common conversation I have with visitors to exhibitions and shows that I take part in. Lino cutting doesn't have to be this way! Its a very simple process and can be experimental and surprising in outcomes. Below are my top tips for lino printing, I hope that you have a go, and any questions or tips you might have then bob them in the comments section.
If you would like to see a video of me working then click here!
Top tips for lino printing
1-Paint a thin layer of acrylic paint over the top of the lino before you transfer the image. I use battleship grey lino and the contrast between the cut and uncut lino isn't always that strong. Putting a bold colour over the top helps you see how the design will look as you're cutting away. Don't worry about what colour you use, it wont affect the final print.
 |
| photo of lino tool, acrylic paint on board and sharpening file |
2-Keep your tools sharp! whether you have a cheap set with interchangeable blades or have invested in something more fancy, if the blades not sharp your lines wont be smooth, you will hurt your hands and just make more work for yourself. Look out for sharpening files and stones, there's a lot of options out there. Watch videos on YouTube or if in London have a visit to Intaglio Print makers where you can try out the tools and ask specific questions.
3-Always cut away from yourself. The sharp part of the tool should never be facing you. It just takes one slip for that tool to cut your finger or your hand. I have done this a few times, usually when I am tired or impatient to finish a project. Take your time and move the lino around to get it into the right position.
 |
| Always have the sharp point away from your hand |
4-Reverse your image-This is especially true when you're printing letters. I always work from a drawing and that drawing sits a certain way. My usual process is to trace my original drawing with tracing paper, flip it over and then use carbon paper to transfer the image onto the lino. I can then draw in more detail if I need/want to or just cut as I go.
5-You've slipped the tool and cut away too much lino! what can you do? well not a lot really. If you have some wood glue close by you can reattach the cut out piece of lino, but this must be done precisely otherwise its a faff on with sanding paper and not great to print. The only time I did this was for a wedding commission, and it was a part of a letter that really needed to be there. The correcting of this mistake took me nearly an hour. At the end of the day only you know the original design, no one will know that extra cut wasn't meant to be there, when you're printing the board you can play around with collage or add in colour, take a deep breath and just experiment.
Bonus tip! lino cuts better when its warm, you could have a little hot water bottle on the side you're not cutting or have a brew to hand....I use the brew technique.
Babble: Jess
I suppose the thing I so often hear is "I can't draw" or I can't even sew a button on". I think we are all often a little too quick to dismiss our own skills and talents, which is why I invite all levels of experience to a workshop; people are often pleasantly surprised at what they can achieve with a little guidance.
Emma and I are huge advocates of drawing (think of it as a fundamental means of communication if nothing else...a way to tell or show others what you are trying to say/plan/create) however if you aren't comfortable or confident with drawing in the "traditional" sense and are struggling to find a way to transfer an idea from paper/photograph to fabric, then there are ways to transfer imagery and drawing onto cloth without having to pull out Derwent's latest set of student pencils. I'd still encourage you to scribble down some ideas...practice makes permanent!
You can see a quick step by step guide to raw edge appliqué on my Instagram stories here. (If you would be interested in a more in-depth tutorial on this method please leave a comment below).
Some other good methods of transfer for fabric:
1. Invest in a very inexpensive but mega useful water soluble fabric marker. There are many different types of fabric marker out there, some disappear with friction or heat, some fade in time, but I have always found the water soluble kind very reliable. You can buy them from most haberdashery stores for a couple of pounds and of course; from Amazon. You can draw straight onto cloth freehand or trace a drawing through onto your fabric; a task which is made much easier using a light box. Your traced or drawn design will look like it's been done with blue felt tipped pen but don't worry; I have never yet found a fabric that these pens won't disappear from (It's good practise to test a small area first). Simply use the lines as your stitch guide then spray or submerge in water and the blue will fade. Some times you are left with tidemarks but if you just keep wetting out or submerging the fabric, all of the blue pen will eventually disappear.
 |
| Water soluble pen was used first to draw in stitch guidelines |
2. Light boxes. You can just tape work to a window and use natural light to trace a drawing onto cloth but this will result in achey arms and wobbly lines. I recently bought a light box which plugs in via a phone charger, for £10. It's absolutely fine for working with cloth and means I can take a rest from tracing a design and the piece won't move or slip (and my arms breathe a sigh of relief).
3. Carbon paper. It seems a bit of an outdated item of stationary these days but the humble sheet of carbon paper, sandwiched in between your cloth and drawing will produce a finer, sharper line than a water soluble pen. This method cannot be washed out as easily but as the line is finer, you'll likely stitch over it anyway. Once you made a fabric/carbon paper/drawing sandwich simply draw or trace your design and it will be transferred onto cloth.
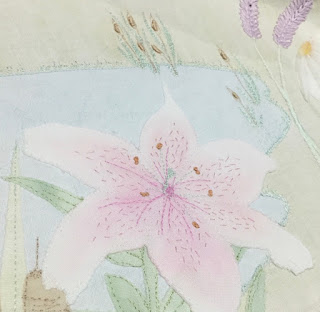
4. Bondaweb. This is a paper-backed iron on glue. You can draw onto the paper side in order to cut fabric onto specific shapes which, once ironed, won't fray and can be ironed into place onto a fabric base. This technique could be a blog post in itself as it takes a little explaining (best done with photos).
 |
| Bondaweb was used here to cut specific floral base shapes which were then embroidered upon |
5. Inkjet cotton. I use inkjet cotton to scan and print old family photos and postcards onto fabric. It's not always washable but that isn't necessary for an art or craft project. It can be bought online, although the supplier I use has just closed down, so I can't currently share a link. It is a paper-backed sheet of cotton which can be fed through a home inkjet printer for crisp photo-quality printing. Once printed, peel of the paper backing and you're ready to cut, stitch and create!
 |
| Framed Memories workshop sample using inkjet cotton for photograph |


Comments
Post a Comment